How to Grow Thai Holy Basil: The Complete Beginner's Guide to Sacred Basil
Thai holy basil (Ocimum tenuiflorum), also known as sacred basil or tulsi, is one of the most revered herbs in Thai cuisine and culture. Unlike its sweeter cousin, Thai sweet basil, holy basil delivers an intense, peppery flavor with hints of clove that's absolutely essential for authentic Thai dishes like Pad Krapow (Thai basil stir-fry).
If you've ever wondered how to grow this sacred herb in your own garden, you're in the right place. This comprehensive guide will take you from complete beginner to confident Thai holy basil grower, with specific tips for success in various climates across the United States.
What Makes Thai Holy Basil Special?
Thai holy basil stands apart from other basil varieties in several key ways:
Intense flavor profile: Spicy, peppery, and slightly bitter with warming clove undertones
Sacred significance: Considered holy in Hindu and Buddhist traditions
Culinary importance: The only basil that can create authentic Pad Krapow
Medicinal properties: Used in traditional Ayurvedic medicine for stress relief
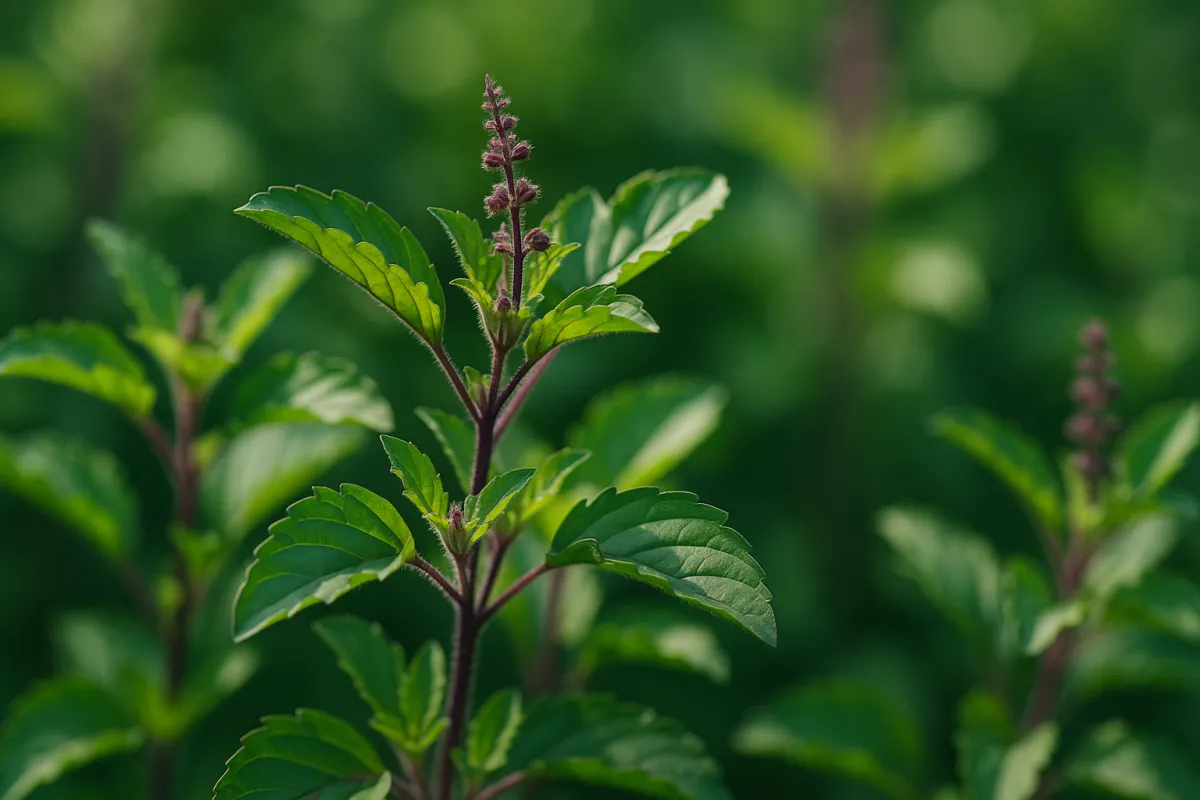
Visual appeal: Purple-tinged stems and serrated leaves make it ornamental too
Thai Holy Basil vs. Other Basil Varieties
Many beginning gardeners confuse Thai holy basil with other varieties. Here's how to tell them apart:
Thai Holy Basil (Ocimum tenuiflorum)
Serrated, pointed leaves
Purple-tinged stems
Spicy, peppery flavor
Annual in most climates
Thai Sweet Basil (Ocimum basilicum)
Smooth, rounded leaves
Green stems
Sweet, anise-like flavor
More cold-tolerant
Italian Sweet Basil
Large, smooth leaves
Bright green color
Sweet, mild flavor
Most common variety
Getting Started: Thai Holy Basil Growing Basics
Climate Requirements
Thai holy basil thrives in warm, humid conditions similar to its native Southeast Asian habitat. Here's what you need to know for different US regions:
Ideal Growing Zones: USDA zones 9-11 (year-round outdoor growing) Challenging Zones: 7-8 (container growing recommended) Cold Zones: 3-6 (indoor or greenhouse growing)
Temperature Needs:
Optimal growing temperature: 70-85°F (21-29°C)
Minimum temperature: 50°F (10°C)
Dies at first frost
When to Plant Thai Holy Basil
From Seeds:
Start indoors: 6-8 weeks before last frost
Direct sow outdoors: 2-3 weeks after last frost date
Soil temperature should be consistently above 60°F
From Seedlings:
Transplant outdoors: After all danger of frost has passed
Harden off for 7-10 days before transplanting
Regional Planting Schedule:
Region Start Seeds Indoors Transplant Outdoors Direct Sow South (Zones 9-11) February-March March-April April-May Central (Zones 7-8) March-April May May-June North (Zones 3-6) April-May June Not recommended
Step-by-Step Growing Guide
1. Starting from Seeds
Thai holy basil seeds can be tricky to find, but they're worth seeking out from specialty herb suppliers or Asian grocery stores.
Seed Starting Materials:
High-quality seed starting mix
Small pots or seed trays
Grow lights or sunny windowsill
Heat mat (optional but helpful)
Seeding Steps:
Fill seed trays with moistened seed starting mix
Sprinkle 2-3 seeds per cell (seeds are tiny!)
Barely cover with soil - they need light to germinate
Keep soil consistently moist but not waterlogged
Maintain temperature around 75°F for best germination
Expect germination in 7-14 days
Pro Tip: Thai holy basil seeds are incredibly small and can be difficult to handle. Mix them with fine sand to make sowing easier.
2. Transplanting Seedlings
Once your seedlings have 2-3 sets of true leaves and are about 3 inches tall, they're ready to transplant.
Hardening Off Process:
Day 1-2: Place outside in shade for 2-3 hours
Day 3-4: Increase to 4-5 hours, some morning sun
Day 5-6: Full day outside, bring in at night
Day 7-10: Leave outside overnight if temperatures stay above 50°F
3. Soil Preparation
Thai holy basil performs best in well-draining, fertile soil with plenty of organic matter.
Soil Requirements:
pH level: 6.0-7.5 (slightly acidic to neutral)
Drainage: Excellent - soggy soil kills basil quickly
Organic matter: Rich in compost or aged manure
Texture: Loose, loamy soil
Soil Preparation Recipe:
1 part garden soil
1 part compost
1 part perlite or coarse sand
Handful of worm castings per plant
4. Planting Location and Spacing
Sunlight Needs:
Full sun: 6-8 hours of direct sunlight daily
Morning sun is essential
Some afternoon shade okay in extremely hot climates (zones 9-11)
Spacing Requirements:
Plant spacing: 12-18 inches apart
Row spacing: 18-24 inches
Container size: Minimum 12-inch diameter pot
Container Growing Guide
Growing Thai holy basil in containers is often the best approach for gardeners in cooler climates, as it allows you to move plants indoors when temperatures drop.
Container Selection
Size Requirements:
Minimum: 12-inch diameter, 10-inch deep
Optimal: 16-18 inch diameter, 12-inch deep
Drainage holes are absolutely essential
Best Container Materials:
Terra cotta: Excellent drainage, breathable
Plastic: Retains moisture longer, lighter weight
Fabric pots: Superior drainage and root health
Avoid: Metal containers (get too hot)
Container Growing Tips
Use quality potting mix: Never use garden soil in containers
Ensure drainage: Add gravel layer at bottom if needed
Monitor water closely: Containers dry out faster
Fertilize regularly: Nutrients wash out of containers quickly
Provide wind protection: Container plants are more vulnerable
Care and Maintenance
Watering Requirements
Proper watering is crucial for healthy Thai holy basil. The key is consistency without waterlogging.
Watering Guidelines:
Deep, infrequent watering is better than frequent shallow watering
Water when top inch of soil feels dry
Water at soil level to avoid wet leaves
Morning watering is ideal
Reduce watering in cooler weather
Signs of Proper Watering:
Soil moist but not soggy
Leaves remain upright and vibrant
No standing water around plants
Watering Problems to Avoid:
Overhead watering (promotes fungal diseases)
Watering late in the day (leaves stay wet overnight)
Inconsistent watering (stresses plants)
Fertilization Schedule
Thai holy basil is a moderate feeder that benefits from regular, gentle fertilization.
Fertilizer Options:
Organic Approach:
Compost tea: Every 2 weeks
Fish emulsion: Weekly during peak growth
Kelp meal: Monthly soil amendment
Worm castings: Top-dress monthly
Conventional Approach:
Balanced liquid fertilizer (10-10-10): Bi-weekly
Dilute to half strength to avoid burning
Seasonal Fertilization:
Spring: Higher nitrogen for leaf growth
Summer: Balanced feeding for continuous harvest
Fall: Reduce feeding as growth slows
Pruning and Harvesting
Regular harvesting actually improves plant health and productivity.
Harvesting Guidelines:
Start harvesting when plants are 6-8 inches tall
Pinch or cut just above a leaf node
Harvest frequently to prevent flowering
Take no more than 1/3 of the plant at once
Best flavor is in morning after dew evaporates
Pruning for Plant Health:
Remove flower buds immediately (they make leaves bitter)
Pinch growing tips to encourage bushier growth
Remove any yellowing or damaged leaves
Prune in the morning for best plant recovery
Common Growing Problems and Solutions
Problem 1: Seeds Won't Germinate
Possible Causes:
Old or poor-quality seeds
Too cool soil temperature
Soil too wet or too dry
Seeds planted too deeply
Solutions:
Source fresh seeds from reputable suppliers
Use heat mat to maintain 75°F soil temperature
Keep soil consistently moist but not soggy
Barely cover seeds with soil
Problem 2: Seedlings Dying (Damping Off)
Symptoms:
Seedlings fall over at soil line
Stems appear water-soaked and dark
Rapid spread to nearby seedlings
Prevention:
Use sterile seed starting mix
Provide good air circulation
Avoid overwatering
Water from bottom when possible
Treatment:
Remove affected seedlings immediately
Improve air circulation
Apply cinnamon powder as natural fungicide
Problem 3: Yellow Leaves
Possible Causes:
Overwatering (most common)
Nutrient deficiency
Natural aging of lower leaves
Disease issues
Solutions:
Check soil drainage and adjust watering
Apply balanced fertilizer
Remove affected leaves
Ensure good air circulation
Problem 4: Plants Not Growing
Possible Causes:
Insufficient sunlight
Poor soil drainage
Cool temperatures
Nutrient deficiency
Solutions:
Move to sunnier location
Improve soil drainage
Wait for warmer weather
Apply gentle fertilizer
Problem 5: Pest Issues
Common Pests:
Aphids: Small green or black insects on leaves
Spider mites: Tiny webs on undersides of leaves
Whiteflies: Small white flying insects
Flea beetles: Small holes in leaves
Organic Control Methods:
Neem oil spray for aphids and whiteflies
Insecticidal soap for soft-bodied insects
Companion planting with marigolds or nasturtiums
Hand-picking larger pests
Problem 6: Disease Issues
Common Diseases:
Fusarium wilt: Plants wilt despite moist soil
Bacterial leaf spot: Dark spots on leaves
Powdery mildew: White powdery coating on leaves
Prevention:
Ensure good air circulation
Avoid overhead watering
Don't overcrowd plants
Remove infected plant material immediately
Regional Growing Tips
Hot Climate Regions (Zones 9-11)
Advantages:
Can grow year-round
Multiple harvests possible
Plants may survive as perennials
Special Considerations:
Provide afternoon shade in extreme heat
Increase watering frequency
Watch for heat stress (wilting during hottest part of day)
May need to replant if plants get too woody
Moderate Climate Regions (Zones 7-8)
Advantages:
Good growing season from late spring to fall
Less pest pressure than tropical areas
Easier to manage watering
Special Considerations:
Start seeds indoors for longer season
Consider container growing for mobility
Have frost protection ready
Save seeds for next year before frost
Cool Climate Regions (Zones 3-6)
Advantages:
Fewer pest and disease issues
Container growing allows season extension
Can grow indoors year-round
Special Considerations:
Definitely start seeds indoors
Use containers for mobility
Consider greenhouse or high tunnel growing
Plan for indoor growing in winter
Harvesting and Storage
When to Harvest
Begin harvesting when plants reach 6-8 inches tall
Harvest in the morning after dew has dried
Best flavor is just before flowering
Regular harvesting encourages continued production
How to Harvest
Cut Method: Use clean scissors or pruning shears
Pinch Method: Pinch stems between thumb and forefinger
Location: Cut just above a leaf node to encourage branching
Amount: Take no more than 1/3 of the plant at once
Storage Methods
Fresh Storage:
Wash and dry thoroughly
Store in refrigerator in plastic bag for up to 1 week
Or place stems in water like flowers (change water daily)
Drying:
Air dry: Hang bundles in warm, dry, dark place
Oven dry: Low temperature (95-115°F) for 2-4 hours
Dehydrator: Follow manufacturer's instructions
Freezing:
Blanch briefly in boiling water
Ice bath to stop cooking
Drain and freeze in airtight containers
Or freeze in ice cube trays with oil
Seed Saving
Thai holy basil is an annual plant, so saving seeds ensures you'll have plants for next year.
Seed Collection Process
Let some plants flower: Allow a few plants to go to seed late in season
Wait for seed maturity: Seeds are ready when they turn brown/black
Harvest seed heads: Cut entire flower heads on a dry morning
Dry thoroughly: Hang bundles in warm, dry place for 2-3 weeks
Extract seeds: Rub dried flower heads to release seeds
Clean seeds: Remove chaff and debris
Store properly: Keep in cool, dry place in labeled envelopes
Seed Viability
Fresh Thai holy basil seeds remain viable for 4-5 years
Store in cool, dry conditions
Test germination rate before planting season
Save extra seeds to share with fellow gardeners
Using Your Thai Holy Basil Harvest
Culinary Applications
Thai holy basil is essential for authentic Thai cooking:
Classic Dishes:
Pad Krapow (Thai Basil Stir-Fry)
Thai Green Curry
Larb (Thai Meat Salad)
Thai Basil Fried Rice
Cooking Tips:
Add at the very end of cooking to preserve flavor
Use raw in salads and fresh preparations
Pairs excellently with chilies, garlic, and fish sauce
Don't substitute with sweet basil - the flavor is completely different
Medicinal Uses
In traditional medicine, Thai holy basil is valued for:
Stress reduction and adaptogenic properties
Respiratory health support
Digestive aid
Natural antimicrobial properties
Note: Consult healthcare providers before using herbs medicinally.
Companion Planting
Thai holy basil grows well alongside:
Good Companions:
Tomatoes (basil repels tomato hornworms)
Peppers (including Thai chilies!)
Eggplant
Marigolds (pest deterrent)
Nasturtiums (trap crop for aphids)
Plants to Avoid:
Rue (inhibits basil growth)
Sage (can stunt basil development)
Fennel (allelopathic effects)
Troubleshooting Quick Reference
Problem Most Likely Cause Quick Solution Seeds not germinating Too cool, too wet, or old seeds Increase temperature, check moisture, get fresh seeds Seedlings falling over Damping off disease Improve air circulation, reduce watering Yellow leaves Overwatering or nutrient deficiency Check drainage, apply fertilizer Slow growth Insufficient light or nutrients Move to sunnier spot, fertilize Wilting despite moist soil Root rot or disease Improve drainage, consider replacing plant Small holes in leaves Flea beetles Apply row cover or organic insecticide Sticky honeydew on leaves Aphids Spray with insecticidal soap
Seasonal Calendar
Spring (March-May)
Start seeds indoors
Prepare garden beds
Harden off and transplant seedlings
Begin outdoor direct seeding in warm areas
Summer (June-August)
Plant final crops for fall harvest
Harvest regularly
Maintain consistent watering
Watch for pest issues
Fall (September-November)
Continue harvesting until frost
Collect seeds from flowering plants
Prepare for indoor growing
Take cuttings for overwintering
Winter (December-February)
Plan for next year's garden
Order seeds
Maintain indoor plants
Start early seeds in late winter
Frequently Asked Questions
Q: Can I grow Thai holy basil indoors year-round? A: Yes! Thai holy basil can be grown indoors with adequate light (grow lights may be necessary), proper drainage, and good air circulation.
Q: Why do my Thai holy basil leaves taste bitter? A: Bitterness usually indicates the plant is flowering or stressed. Pinch off flower buds regularly and ensure consistent watering and fertilization.
Q: Can I substitute Thai holy basil with sweet basil? A: No, the flavors are completely different. Thai holy basil has a spicy, peppery flavor that's essential for authentic Thai dishes.
Q: How long does it take from seed to harvest? A: From seed, you can typically start harvesting in 60-90 days, depending on growing conditions.
Q: Is Thai holy basil the same as tulsi? A: Yes, they're the same plant (Ocimum tenuiflorum), though different varieties may have slightly different characteristics.
Conclusion
Growing Thai holy basil successfully comes down to understanding its basic needs: warmth, good drainage, plenty of sunlight, and regular harvesting. While it may seem challenging at first, especially for gardeners in cooler climates, the incredible flavor and culinary possibilities make the effort absolutely worthwhile.
Start small with a few plants, pay attention to their needs, and don't be discouraged if your first attempt isn't perfect. Like all gardening skills, growing Thai holy basil improves with experience. Soon you'll be harvesting your own sacred basil for authentic Thai cooking that rivals any restaurant.
Remember, the key to success is consistent care rather than perfect conditions. Even a single thriving plant can provide enough holy basil for many delicious meals while connecting you to the rich culinary traditions of Thailand.
Whether you're growing in containers on a balcony or cultivating rows in your garden, Thai holy basil will reward your efforts with intense flavor, beautiful foliage, and the satisfaction of growing your own authentic Thai ingredients.
Happy growing, and may your garden be filled with the sacred aroma of fresh Thai holy basil!
Have questions about growing Thai holy basil? Share your experiences and challenges in the comments below. We love hearing from fellow gardeners and are always here to help troubleshoot any growing issues you might encounter.
