How to Grow Thai Bird Chilies: The Ultimate Guide to Fiery Prik Kee Noo
Thai bird chilies, known as "prik kee noo" in Thailand (literally meaning "mouse dropping chili"), are among the hottest and most flavorful chilies you can grow at home. Despite their tiny size—typically just ½ to 1 inch long—these fiery peppers pack an incredible punch, measuring between 100,000 to 225,000 Scoville Heat Units.
If you've ever tasted authentic Thai cuisine and wondered how to capture that perfect balance of heat and flavor, growing your own Thai bird chilies is the answer. This comprehensive guide will take you from complete beginner to successful chili grower, with specific advice for various US growing conditions.
Understanding Thai Bird Chilies (Prik Kee Noo)
What Makes Thai Bird Chilies Special?
Thai bird chilies are not just about heat—they bring a complex flavor profile that's impossible to replicate with other pepper varieties:
Flavor Profile:
Intense, immediate heat that builds quickly
Bright, fruity undertones
Clean, pure chili flavor without bitterness
Aromatic oils that enhance any dish
Physical Characteristics:
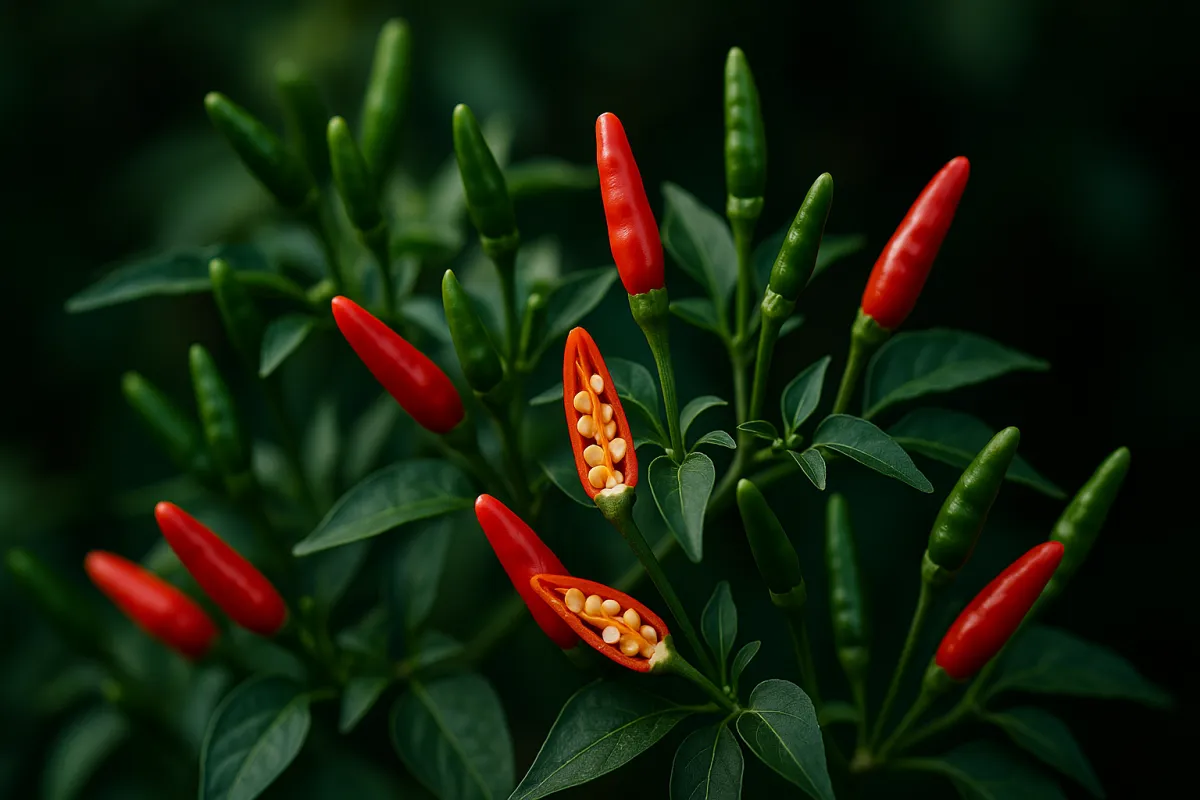
Size: ½ to 1 inch long, ¼ inch wide
Shape: Tapered, pointed ends
Color progression: Green → white → red when fully ripe
Plant size: 2-3 feet tall, bushy growth habit
Heat Level Comparison
To put Thai bird chilies in perspective:
Thai Bird Chili: 100,000-225,000 SHU
Habanero: 100,000-350,000 SHU
Cayenne: 30,000-50,000 SHU
Jalapeño: 2,500-8,000 SHU
Bell Pepper: 0 SHU
Safety Note: Always wear gloves when handling Thai bird chilies, and keep away from eyes and sensitive areas.
Getting Started: Growing Requirements
Climate Needs
Thai bird chilies originate from tropical Southeast Asia and thrive in warm, humid conditions. Here's how to succeed across different US regions:
Ideal Conditions:
Temperature range: 70-85°F (21-29°C)
Humidity: 60-80%
Growing season: 120-150 days from seed to full harvest
Frost tolerance: None (will die at 32°F/0°C)
Regional Adaptability:
USDA Zone Growing Method Season Length Special Considerations 9-11 Outdoor year-round Extended May overwinter 7-8 Outdoor seasonal Full season Container recommended 5-6 Container/greenhouse Shortened Indoor start essential 3-4 Indoor/greenhouse only Limited Grow lights needed
When to Start Thai Bird Chilies
From Seeds (Recommended):
Indoor start: 8-12 weeks before last frost
Direct sow outdoors: Only in zones 9-11, after soil reaches 65°F
Transplant outdoors: 2-3 weeks after last frost date
Regional Planting Timeline:
Region Start Seeds Indoors Transplant Outdoors First Harvest Expected South (9-11) February April June-July Central (7-8) March May July-August North (5-6) February-March June August-September Far North (3-4) February Container only September-October
Step-by-Step Seed Starting Guide
Sourcing Quality Seeds
Finding authentic Thai bird chili seeds can be challenging but is crucial for success:
Best Sources:
Asian grocery stores (fresh chilies for seed collection)
Specialty seed companies focusing on hot peppers
Online retailers with good reviews
Fellow gardeners and seed swaps
What to Look For:
Seeds from current or previous year
Proper species identification (Capsicum annuum)
High germination rate guarantees
Organic or heirloom varieties when possible
Seed Preparation
Thai bird chili seeds can be slow and erratic to germinate without proper preparation:
Pre-germination Treatment:
Soak seeds: 24 hours in warm water (80°F)
Paper towel method: Place on moist paper towel in warm location
Check daily: Look for tiny white root tips (usually 5-10 days)
Plant immediately: Once roots appear, plant carefully
Alternative Method - Direct Seeding:
Use high-quality seed starting mix
Plant ¼ inch deep
Maintain consistent 80-85°F soil temperature
Expect germination in 7-21 days
Optimal Germination Conditions
Temperature Requirements:
Soil temperature: 80-85°F (27-29°C) for best results
Air temperature: 75-80°F (24-27°C)
Use heat mats if necessary
Moisture and Light:
Keep soil consistently moist but never waterlogged
Cover with plastic wrap to maintain humidity
Provide light once seedlings emerge
Remove plastic wrap after germination
Transplanting and Planting
Preparing Seedlings for Transplant
Before moving outdoors, seedlings need proper development and hardening:
Ready to Transplant Indicators:
4-6 true leaves (not counting seed leaves)
3-4 inches tall
Strong, sturdy stems
Well-developed root system
Hardening Off Process (7-10 days):
Days 1-2: Shade outside for 2-3 hours
Days 3-4: Morning sun, 4-5 hours outside
Days 5-6: Full day outside, bring in at night
Days 7-10: Leave outside if nights above 50°F
Soil Preparation
Thai bird chilies perform best in well-draining, fertile soil with good organic matter content.
Soil Requirements:
pH level: 6.0-6.8 (slightly acidic)
Drainage: Excellent (waterlogged soil kills peppers)
Organic matter: 25-30% compost or aged manure
Texture: Loose, loamy soil that warms quickly
Ideal Soil Mix Recipe:
40% quality topsoil or garden soil
30% compost or aged manure
20% perlite or coarse sand for drainage
10% aged bark or coco coir for structure
Planting Location and Spacing
Sunlight Requirements:
Full sun: Minimum 6-8 hours direct sunlight
Morning sun is essential for drying dew
Some afternoon shade acceptable in extreme heat (zones 9-11)
Avoid windy locations that can damage plants
Spacing Guidelines:
Plant spacing: 18-24 inches apart
Row spacing: 24-36 inches
Container size: Minimum 5-gallon capacity
Height at maturity: 24-36 inches
Container Growing Guide
Container growing is often the best approach for Thai bird chilies, especially in cooler climates where you need to move plants indoors.
Container Selection
Size Requirements:
Minimum: 5-gallon container
Optimal: 7-10 gallon container
Depth: At least 12 inches
Drainage: Multiple holes essential
Best Container Types:
Fabric pots: Excellent drainage and root health
Plastic pots: Good moisture retention
Terra cotta: Natural breathability but dries fast
Self-watering containers: Good for consistent moisture
Container Growing Success Tips
Use premium potting mix: Never use garden soil
Ensure excellent drainage: Add extra perlite if needed
Provide stability: Use stakes or tomato cages
Monitor water closely: Containers dry out faster
Fertilize regularly: Nutrients leach out quickly
Consider wheels: For easy movement when weather changes
Care and Maintenance
Watering Requirements
Proper watering is crucial for healthy pepper development and fruit production.
Watering Best Practices:
Deep, less frequent watering preferred
Water when top 1-2 inches of soil feel dry
Water at soil level to avoid leaf diseases
Morning watering allows plants to dry before evening
Reduce watering as temperatures cool
Signs of Proper Watering:
Soil moist but not soggy 2 inches down
Plants remain upright without wilting
No standing water around plants
Healthy, dark green foliage
Common Watering Mistakes:
Overhead watering (promotes disease)
Inconsistent watering (causes blossom end rot)
Overwatering (causes root rot)
Watering late in the day (leaves stay wet overnight)
Fertilization Program
Thai bird chilies are moderate to heavy feeders that benefit from regular, balanced nutrition.
Fertilizer Schedule:
Seedling Stage (0-4 weeks after transplant):
Light feeding with diluted balanced fertilizer
Focus on gentle root development
Avoid high nitrogen (causes excessive leafy growth)
Vegetative Growth (4-8 weeks):
Balanced fertilizer (10-10-10 or similar)
Every 2-3 weeks
Can handle slightly higher nitrogen
Flowering and Fruiting (8+ weeks):
Lower nitrogen, higher phosphorus and potassium
Fertilizer ratio like 5-10-10
Every 2-4 weeks depending on plant response
Organic Fertilizer Options:
Compost tea: Weekly during growing season
Fish emulsion: Every 2-3 weeks
Kelp meal: Monthly soil amendment
Bone meal: At planting and mid-season
Worm castings: Monthly top-dressing
Signs of Proper Nutrition:
Dark green, healthy foliage
Steady flower production
Good fruit set and development
No yellowing of lower leaves
Support and Staking
Thai bird chili plants become top-heavy when loaded with fruit and benefit from support.
Support Options:
Tomato cages: 3-4 foot height works well
Single stakes: Bamboo or metal, 4-5 feet tall
Florida weave system: For multiple plants in rows
DIY supports: PVC or wood frame systems
When to Install Support:
At planting time to avoid root damage
Before plants reach 12 inches tall
Use soft ties that won't cut into stems
Check and adjust ties regularly as plants grow
Pest and Disease Management
Common Pest Issues
Aphids
Identification: Small, green or black soft-bodied insects on leaves and stems
Damage: Yellowing leaves, stunted growth, sticky honeydew
Control: Insecticidal soap, beneficial insects, blast off with water
Spider Mites
Identification: Tiny webs on leaf undersides, stippled leaves
Damage: Yellow speckling on leaves, eventual leaf drop
Control: Increase humidity, predatory mites, neem oil spray
Hornworms
Identification: Large green caterpillars, often hard to spot
Damage: Large holes in leaves, missing leaves, damaged fruit
Control: Hand-picking, beneficial wasps, Bt spray
Flea Beetles
Identification: Small, dark jumping beetles
Damage: Small round holes in leaves
Control: Row covers, diatomaceous earth, beneficial nematodes
Thrips
Identification: Tiny, slender insects; silvery scarring on leaves
Damage: Stippled, silvery appearance on leaves
Control: Blue sticky traps, beneficial insects, neem oil
Disease Prevention and Treatment
Bacterial Leaf Spot
Symptoms: Dark, water-soaked spots on leaves
Prevention: Avoid overhead watering, provide air circulation
Treatment: Remove affected leaves, copper-based fungicide
Fusarium Wilt
Symptoms: Yellowing leaves, wilting despite moist soil
Prevention: Well-draining soil, avoid overwatering
Treatment: Usually fatal; prevent with healthy soil practices
Powdery Mildew
Symptoms: White, powdery coating on leaves
Prevention: Good air circulation, avoid overhead watering
Treatment: Baking soda spray, milk solution, neem oil
Blossom End Rot
Symptoms: Dark, sunken spots on fruit bottoms
Cause: Calcium deficiency due to inconsistent watering
Prevention: Consistent moisture, mulching, proper nutrition
Integrated Pest Management (IPM) Approach
Prevention: Healthy plants resist pests better
Monitoring: Regular inspection for early detection
Cultural controls: Proper spacing, sanitation, rotation
Biological controls: Beneficial insects, companion plants
Organic treatments: Neem oil, insecticidal soap, Bt
Chemical controls: Only as last resort, follow labels carefully
Flowering and Fruit Development
Understanding Pepper Flowering
Thai bird chili plants typically begin flowering 6-10 weeks after transplanting, depending on growing conditions.
Flower Characteristics:
Small, white, star-shaped flowers
Self-pollinating (don't need multiple plants)
Flowers appear at leaf joints (nodes)
Multiple flowers per node common
Factors Affecting Flowering:
Temperature: Optimal flowering at 70-85°F
Day length: Some varieties are day-neutral
Nutrition: Too much nitrogen delays flowering
Water stress: Moderate stress can trigger flowering
Encouraging Fruit Set
Optimal Conditions for Fruit Set:
Consistent temperatures between 70-85°F
Adequate but not excessive nitrogen
Regular but not excessive watering
Good air circulation for pollination
Common Fruit Set Problems:
Flower drop: Usually caused by temperature stress or overwatering
No fruit development: Often due to extreme temperatures or poor nutrition
Small fruit load: May indicate need for better growing conditions
Improving Fruit Set:
Gentle shaking of plants to aid pollination
Avoid temperature extremes
Maintain consistent soil moisture
Reduce nitrogen once flowering begins
Harvesting Thai Bird Chilies
When to Harvest
Thai bird chilies can be harvested at different stages depending on intended use:
Green Stage (Immature):
Size: Full size but not yet colored
Flavor: Milder heat, grassy flavor
Best for: Fresh cooking, pickling
Harvest timing: 60-80 days from transplant
Red Stage (Fully Ripe):
Size: Full size, bright red color
Flavor: Maximum heat and complexity
Best for: Drying, hot sauces, paste
Harvest timing: 90-120 days from transplant
Harvesting Techniques
Proper Harvesting Method:
Always wear gloves: Oils can burn skin and eyes
Use clean scissors or pruners: Avoid pulling fruit
Cut stem close to fruit: Leave small stem attached
Harvest in morning: After dew dries but before heat of day
Handle gently: Avoid bruising delicate fruit
Harvesting Tips:
Regular harvesting encourages more production
Don't let all fruit ripen on plant (reduces production)
Harvest before first frost
Pick green fruit before cold weather and let ripen indoors
Yield Expectations
Typical Yields per Plant:
Container plants: 50-100 chilies per season
Garden plants: 100-200+ chilies per season
Peak production: Usually mid to late summer
Production period: Continuously until frost
Storage and Preservation
Fresh Storage
Short-term Storage (1-2 weeks):
Refrigerate in perforated plastic bag
Store in vegetable crisper drawer
Don't wash until ready to use
Check regularly and remove any soft fruit
Room Temperature Storage:
Only for 2-3 days maximum
Keep in well-ventilated area
Away from direct sunlight
Good for immediate use
Long-term Preservation Methods
Drying Methods:
Air Drying:
Thread whole chilies on string
Hang in warm, dry, well-ventilated area
Takes 2-4 weeks depending on humidity
Store in airtight containers when fully dry
Oven Drying:
Set oven to lowest temperature (150-170°F)
Place chilies on baking sheets
Dry for 6-12 hours, checking frequently
Chilies should be brittle when done
Dehydrator Method:
Follow manufacturer's instructions
Usually 125-135°F for 8-12 hours
Most reliable method for consistent results
Freezing:
Whole chilies: Wash, dry, freeze in bags
No blanching needed for hot peppers
Use directly from frozen in cooking
Good for 6-12 months
Making Chili Paste:
Remove stems from fresh red chilies
Blend with minimal water until smooth
Freeze in ice cube trays
Transfer cubes to freezer bags
Use as needed in cooking
Seed Saving
Thai bird chilies are open-pollinated, making seed saving straightforward and rewarding.
Selecting Fruit for Seeds
Best Practices:
Choose fully ripe, red fruit from healthiest plants
Select fruit from early-producing plants
Avoid fruit from stressed or diseased plants
Choose typical-looking fruit (not abnormal shapes)
Seed Extraction Process
Step-by-Step:
Wear gloves: Essential for safety
Cut open ripe fruit: Use clean knife
Remove seeds: Scrape out with spoon or knife tip
Clean seeds: Remove pulp and dry matter
Rinse if needed: Quick rinse in cool water
Dry thoroughly: Spread on paper towels for 1-2 weeks
Seed Storage
Proper Storage Conditions:
Completely dry (crisp, not bendable)
Cool, dark location
Airtight containers with labels
Silica gel packets help absorb moisture
Freezer storage extends viability
Seed Viability:
Fresh seeds: 90%+ germination rate
1-2 years old: 80-90% germination
3-4 years old: 60-80% germination
5+ years old: Variable, test before relying on
Troubleshooting Common Problems
Growth Issues
Problem: Slow Growth
Causes: Cool temperatures, poor soil, insufficient light, nutrient deficiency
Solutions: Move to warmer location, improve soil drainage, increase light, fertilize appropriately
Problem: Yellowing Leaves
Causes: Overwatering, nutrient deficiency, natural aging, disease
Solutions: Adjust watering, apply balanced fertilizer, remove affected leaves, improve air circulation
Problem: Dropping Flowers
Causes: Temperature stress, watering issues, too much nitrogen
Solutions: Provide consistent conditions, adjust watering schedule, reduce nitrogen fertilizer
Problem: No Fruit Development
Causes: Poor pollination, temperature extremes, nutritional imbalance
Solutions: Hand-pollinate flowers, protect from temperature extremes, adjust fertilization
Fruit Problems
Problem: Small, Weak Fruit
Causes: Insufficient nutrients, water stress, overcrowding
Solutions: Increase fertilization, improve watering consistency, thin overcrowded fruit
Problem: Fruit Cracking
Causes: Irregular watering, rapid growth after dry period
Solutions: Maintain consistent soil moisture, mulch around plants
Problem: Poor Flavor Development
Causes: Insufficient sunlight, too much nitrogen, harvest too early
Solutions: Ensure full sun exposure, reduce nitrogen, allow fruit to fully ripen
Advanced Growing Techniques
Season Extension Methods
Row Covers:
Lightweight fabric covers extend season 2-4 weeks
Use when temperatures drop below 50°F
Remove during day if temperatures rise above 75°F
Wall O' Water and Season Extenders:
Water-filled plant protectors
Can protect against light frosts
Allow earlier planting and later harvest
Greenhouse Growing:
Year-round production possible
Requires ventilation and temperature control
Watch for increased pest pressure in enclosed spaces
Companion Planting
Good Companions:
Basil: Natural pest deterrent, doesn't compete for space
Tomatoes: Similar growing requirements, beneficial insects
Marigolds: Pest-repelling properties, attractive flowers
Oregano: Natural pest control, efficient space use
Plants to Avoid:
Fennel: Allelopathic effects on many plants
Brassicas: Different soil pH preferences
Large plants: That shade peppers (corn, sunflowers)
Maximizing Production
Pruning Techniques:
Remove suckers (shoots growing from main stem joints)
Pinch early flowers to encourage larger plant development
Remove lower leaves touching soil to prevent disease
Succession Planting:
Start new plants every 4-6 weeks in long-season areas
Ensures continuous harvest throughout season
Plant different varieties for extended harvest period
Regional Growing Guides
Hot Climate Regions (Zones 9-11)
Advantages:
Long growing season (9+ months)
Multiple harvests possible
Plants may survive winter as perennials
Special Considerations:
Provide afternoon shade in extreme heat (100°F+)
Increase watering frequency during hot periods
Watch for heat stress (wilting during hottest part of day)
May need to protect from intense sun with shade cloth
Heat Management Tips:
Mulch heavily to keep roots cool
Use shade cloth (30-50%) during extreme heat
Ensure excellent air circulation
Consider container growing for mobility
Moderate Climate Regions (Zones 7-8)
Advantages:
Full growing season from spring to fall
Less extreme weather conditions
Good balance of heat and manageable conditions
Special Considerations:
Start seeds indoors for full season
Use season extension techniques for earlier/later harvest
Container growing recommended for flexibility
Save seeds before first frost
Season Extension:
Use row covers for early/late season protection
Consider cold frames for extended growing
Move containers to protected areas during cold snaps
Cool Climate Regions (Zones 5-6)
Advantages:
Fewer pest and disease issues
Container growing allows season extension
Can focus on shorter-season varieties
Special Considerations:
Definitely start seeds indoors (February-March)
Use containers for mobility
Consider greenhouse or high tunnel growing
Focus on early-maturing varieties
Maximizing Short Seasons:
Use black plastic mulch to warm soil
Choose warm, protected planting locations
Start with larger transplants
Use Wall O' Water or similar protection
Very Cool Climate Regions (Zones 3-4)
Growing Approach:
Indoor growing throughout season
Greenhouse or sunroom cultivation
Large containers that can be moved
Special Equipment Needed:
Grow lights for adequate lighting
Heat mats for germination
Large containers (10+ gallons)
Temperature monitoring equipment
Using Your Thai Bird Chili Harvest
Culinary Applications
Thai bird chilies are essential for authentic Thai cuisine:
Traditional Uses:
Nam Prik (Thai Chili Paste): Foundation for many dishes
Som Tam: Green papaya salad
Tom Yum: Spicy sour soup
Pad Krapow: Thai basil stir-fry
Green Curry Paste: Essential ingredient
Preparation Tips:
Always wear gloves when handling
Remove seeds to reduce heat (slightly)
Use sparingly - these are extremely hot
Add at end of cooking to preserve flavor
Start with tiny amounts and adjust to taste
Processing for Storage
Making Chili Oil:
Heat neutral oil to 300°F
Add dried, crushed Thai bird chilies
Cool and strain
Store in airtight containers
Chili Powder:
Fully dry chilies until brittle
Remove stems
Grind in spice grinder or mortar and pestle
Store in airtight containers away from light
Fermented Chili Paste:
Blend fresh chilies with salt (3% by weight)
Ferment in clean jar for 1-4 weeks
Refrigerate when desired flavor reached
Use as condiment or cooking ingredient
Safety Considerations
Handling Safety
Essential Safety Practices:
Always wear gloves when handling fresh or dried chilies
Use dedicated cutting boards and knives
Avoid touching face, eyes, or sensitive areas
Wash hands thoroughly with dish soap and oil
Keep chilies away from children and pets
First Aid for Chili Burns:
Milk or yogurt can help neutralize oils
Vegetable oil can help dissolve capsaicin
Avoid water (spreads oils around)
Time is the best remedy - effects usually fade in 30-60 minutes
Growing Safety
Garden Safety:
Wear gloves when harvesting
Wash hands before touching other plants
Keep harvested chilies in labeled containers
Warn visitors about extremely hot peppers
Consider growing in dedicated area away from children's play spaces
Troubleshooting Quick Reference
Problem Most Likely Cause Quick Solution Seeds won't germinate Too cool, old seeds, too wet Increase temperature, fresh seeds, check moisture Seedlings dying Damping off, overwatering Improve air circulation, reduce watering Slow growth Cool temperatures, poor nutrition Move to warmer spot, fertilize No flowers Too much nitrogen, too cool Reduce nitrogen, ensure warm temperatures Flowers dropping Temperature stress, watering issues Stabilize growing conditions No fruit set Poor pollination, extreme temperatures Hand pollinate, protect from extremes Small, weak fruit Poor nutrition, water stress Improve fertilization and watering Pest damage Various insects Identify pest, apply appropriate organic control
Seasonal Care Calendar
Spring (March-May)
Start seeds indoors (8-12 weeks before last frost)
Prepare garden beds and containers
Begin hardening off seedlings
Transplant outdoors after frost danger passes
Begin regular fertilization program
Summer (June-August)
Monitor and adjust watering frequency
Watch for pest and disease issues
Begin harvesting green chilies
Support heavy-laden plants
Continue regular fertilization
Fall (September-November)
Harvest remaining fruit before frost
Collect seeds from best plants
Begin drying chilies for winter storage
Prepare for indoor growing or plant protection
Clean up garden beds
Winter (December-February)
Plan for next year's growing season
Order seeds for spring planting
Maintain indoor plants if growing year-round
Process and use stored chilies
Prepare seed starting equipment
Varieties and Cultivars
Authentic Thai Bird Chili Varieties
Prik Kee Noo Suan (Garden Mouse Dropping):
Classic variety, extremely hot
Small, pointed fruits
Red when ripe, often used green
100,000-225,000 SHU
Prik Kee Noo Kaset (Cultivated Mouse Dropping):
Slightly larger than traditional variety
Good productivity
Reliable heat and flavor
Easier to harvest due to size
Related Hot Pepper Varieties
Thai Dragon:
Similar heat level and flavor
Slightly longer fruits
Good container variety
Readily available seeds
African Bird's Eye:
Similar size and heat
Different flavor profile
More widely available
Good substitute if Thai varieties unavailable
Frequently Asked Questions
Q: How hot are Thai bird chilies compared to jalapeños? A: Thai bird chilies are 20-50 times hotter than jalapeños. While jalapeños measure 2,500-8,000 SHU, Thai bird chilies measure 100,000-225,000 SHU.
Q: Can I grow Thai bird chilies indoors year-round? A: Yes! With adequate light (grow lights may be necessary), proper drainage, and good air circulation, Thai bird chilies can be grown indoors successfully.
Q: Why are my Thai bird chili plants not producing fruit? A: Common causes include temperatures too hot or cold (optimal is 70-85°F), overwatering, too much nitrogen fertilizer, or insufficient sunlight.
Q: How do I know when Thai bird chilies are ready to harvest? A: They can be harvested green at full size (about ½ to 1 inch long) or left to ripen to red. Red chilies have maximum heat and flavor complexity.
Q: Can I save seeds from store-bought Thai bird chilies? A: Yes, if they're fresh and fully ripe. However, germination rates may be lower than from dedicated seed sources, and some may be hybrids that won't grow true to type.
Q: How long do Thai bird chili plants live? A: They're typically grown as annuals, but in frost-free areas (zones 9-11), they can survive as short-lived perennials for 2-3 years.
Q: What's the best way to reduce the heat when cooking with Thai bird chilies? A: Remove seeds and white pith, use very small amounts, pair with dairy products, or use them early in cooking and remove before serving.
Conclusion
Growing Thai bird chilies successfully is incredibly rewarding, giving you access to one of the world's most flavorful and fiery peppers. While they require warm temperatures and consistent care, the principles are straightforward: provide heat, sun, good drainage, and regular feeding.
Start with just a few plants your first year to learn their needs and your tolerance for their intense heat. These small but mighty peppers will transform your cooking, bringing authentic Thai flavors to your kitchen while connecting you to Thailand's rich culinary heritage.
Remember that success comes from understanding their tropical origins and adapting your growing methods accordingly. Whether you're growing in containers on a patio or dedicating garden space to these fiery gems, the incredible flavor and satisfaction of growing your own authentic Thai ingredients makes every effort worthwhile.
The key is patience and consistency - Thai bird chilies reward careful attention with months of productive harvests that will keep your kitchen stocked with genuine Thai heat all year long.
Happy growing, and may your harvests be both bountiful and blazingly hot!
Growing Thai bird chilies for the first time? Share your experiences and questions in the comments below. We're here to help you succeed with these amazing peppers and troubleshoot any challenges you might face along the way.
